

 Creating word art and word art gifts can be a wonderful creative outlet for both adults and kids. Elementary-age kids on up can learn to create word art on their own, and subway art is especially fun, great spelling practice, and a welcomed gift. Preschoolers can often create subway art with a bit of help from an adult or older child.
You can learn to create subway art and any word art with a more advanced photo editing software, such as Adobe Photo Shop. If you start with that, awesome! But PicMonkey is free, and you can still create great word art with it.
Today, I want to share a simple tutorial to help both adults and kids create subway art using PicMonkey.
How to Create Subway Art Gifts Using PicMonkey
1. Have a background you can use for your image or download one of these: WhiteBackground_8x10 or WhiteBackground_8.5×11. (You can color the background in PicMonkey if you wish.)
2. Go to PicMonkey.com.

PicMonkey.com
3. Click on “Edit a photo” and then upload the background you want to use.
4. If you want to color your background, make a colored rectangle to cover the image. Go to the left hand toolbar, click on the icon with the cluster of 3 different shapes, and then select the black rectangle.Create a rectangle by pulling the shape across the screen until it covers all of the white.

Preparing to Choose a Background Color on PicMonkey
5. Click on the color selector that comes up on the right and change the color of your rectangle. Today, I’m using blue for my background color.

Selecting a Background Color on PicMonkey
6. When creating subway art, it’s best to do one line at a time, making sure the text space is full all the way across. You’ll be able to make the words larger if they don’t fill the line. Typically, three or four fonts and three or four colors are used. Use whatever you feel drawn to, though.
You can add text by going to the left hand toolbar, clicking on the capital letter P, and choosing the font you would like to use. Type in your text and click on Add. You can change your font if you wish. If you have trouble, here’s more about using the text feature at PicMonkey.

Adding Text in PicMonkey
7. Once you have the font and color you like, you can stretch the font box (using the little circles on the corners) and drag the box to where you want it on the page. You’ll want to fill up each line, allowing space for a border around the words in case you want to frame your subway art.

Moving Text in PicMonkey
8. Make any adjustments you want to color or font. Note: If you want to go back and change a text box, be sure to click on the brown outside area first to get off the main background before clicking on the text you want to change. To match a color, PicMonkey’s tutorial is especially helpful.
If you’d like to add a star, heart, or another symbol, click on the cluster of 3 different shapes again and choose the symbol you want to add.

Matching Text Color in PicMonkey
9. When you’re finished, click on “Save” above your finished subway art, type in a new file name, then type in the desired file size (I usually choose Pierce, the middle one), and click on the green “Save photo” button. Choose the place to save your photo on your computer, and you’re finished!
I’ve been focusing on gratitude for the 21 Days of Contagious Gratitude, but you can use any theme for your subway art. And a child might want to create “Thank You”- (such as “Thank you, Grandma”) subway art for gifts.

If you’d like a copy of my subway art (without watermark), click here, then right click on the image and choose “Save Picture As . . .”

“For Everything” Word Art Freebie (without watermark)
Kids Winter Holiday Hop and Giveaway


Please join us in sharing your holiday ideas. We have 3 prizes we are giving away in this hop. The only requirement to enter is to leave a comment on Kids Winter Holiday Inspiration Craft and Activity Ideas at Projects for Preschoolers about winter holiday inspiration such as a favorite winter holiday activity, tradition, craft, memory, etc.
Enter to receive one of these packages from Laura Kelly: Family Planner, Mom Planner, or Mom’s journal along with extra sticky notes or shipping list note pads. Plus a goodie bag filled with fun kid craft supplies. Each prize package is valued at $30.
The giveaway will close on December 3rd, 2012 at 7pm EST. Entrants must be 18 years or older and have a US or UK shipping address.
Check out the winter holiday ideas at the participating bloggers’ sites:
Jen Goode – Projects for Preschoolers www.projectsforpreschoolers.com
Susan Wells – Steve Spangler www.stevespangler.com
Cerys Parker – Rainy Day Mum www.rainydaymum.co.uk
Laura Kelly – Laura Kelly Designs www.laurakellydesigns.com
Melissa Klinker – mama♥miss www.mamamiss.com
Deb Chitwood – Raising Figure Skaters www.raisingfigureskaters.com
Rockabye – Rockabye Butterfly www.rockabyebutterfly.com
Rebecca English – Here Come the Girls www.herecomethegirlsblog.com
Tammy Dube – Housing A Forest www.housingaforest.com
Elizabeth Pritchett – Creative Learning Fun www.creativelearningfun.blogspot.com
Please share your posts with your favorite holiday ideas for kids here:
Related Posts
 “Every Day Is Earth Day” Word Art Freebie
 “Guiding Hand on My Shoulder” Word Art Freebie
- “Children Are” Montessori Word Art Freebie
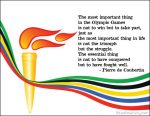
 Olympic Creed Word Art Freebie
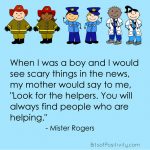
- “Look for the Helpers” Mister Rogers Word Art Freebie
- “Practice Random Kindness” Word-Art Freebie
- “Brief Opportunity” Word Art Freebie
- “Be the Change” Word-Art Freebie


This is a cool idea. I am going to try it out.
Thanks, Wayne! It’s a lot of fun! 🙂
What a fantastic way to use PicMonkey, I never would have thought to make subway art there! Love your project and thank you so much for sharing with the Kid Winter Holiday Hop!
Thanks, Jen! It’s a lot of fun! Thanks so much for all your work at organizing the Kids Winter Holiday Hop. 🙂
Wonderful information! I pinned this to my writing board. Thank you for clear, illustrated steps. Carolyn
Thanks so much, Carolyn! I really appreciate your pinning my post! 🙂 Deb